pyorbbecsdk
Orbbec SDK Python Wrapper Documentation
Contents
- Orbbec SDK Python Wrapper Documentation
Overview
This document mainly introduces the functions of Orbbec SDK Python Wrapper, which is designed and encapsulated based on Orbbec SDK, mainly achieving data stream reception and device command control.
System Requirements
OS Requirements
- Windows: Windows 10 (x64)
- Linux: 18.04/20.04/22.04 (x64)
- Arm32: 18.04/20.04/22.04
- Arm64: Ubuntu18.04/20.04/22.04
Compilation Platform Requirements
- Windows: Visual Studio 2017 and above
- Linux: gcc 5.4.0 and above
- cmake: 3.15.0 and above
- pybind11 2.10.3 and above
Python Version
- Python 3.6.9 and above
Orbbec SDK Python Wrapper Sample Compilation Instructions
Windows Python SDK Compilation
Download the Python SDK source code
git clone https://github.com/orbbec/pyorbbecsdk.git
Install dependencies
pip3 install -r requirements.txt
Here, it is assumed that you have installed Python 3 correctly. If you have not installed Python 3, you can refer to the Python official website and choose your Python 3 version for installation.
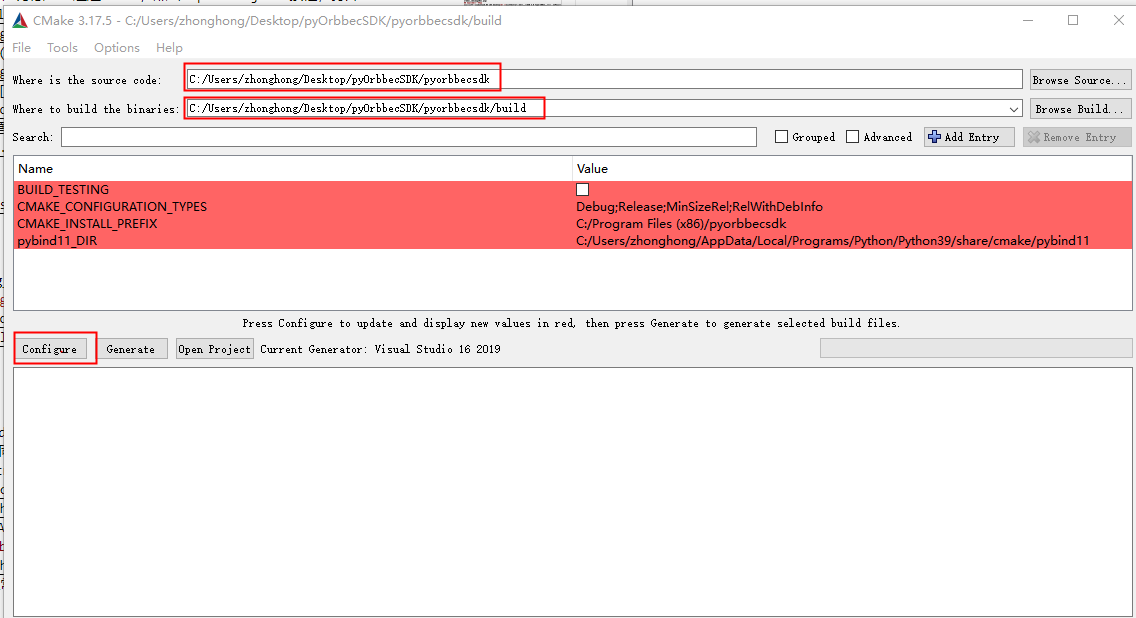
Configure Visual Studio project
- Open Cmake, set the source code path, and set the “build” folder as the path for generating binary files, as shown in the following figure.
- Click “Configure” and select the corresponding Visual Studio version and platform version. Then click “Finish”, as shown below:
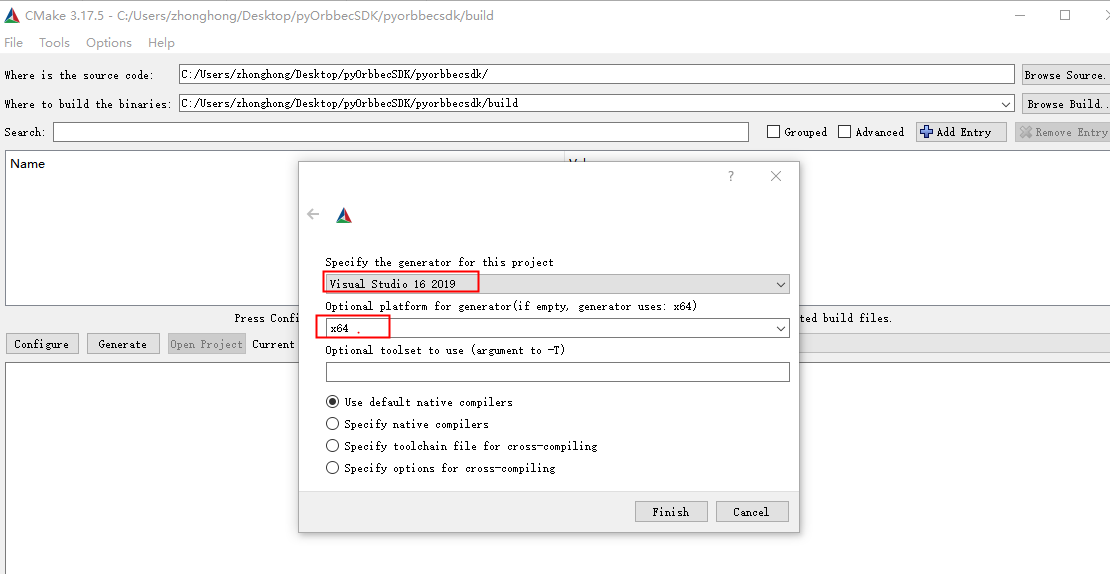
Here, it is assumed that you have installed Cmake correctly. If you have not installed Cmake, you can refer to the Cmake official website for installation.
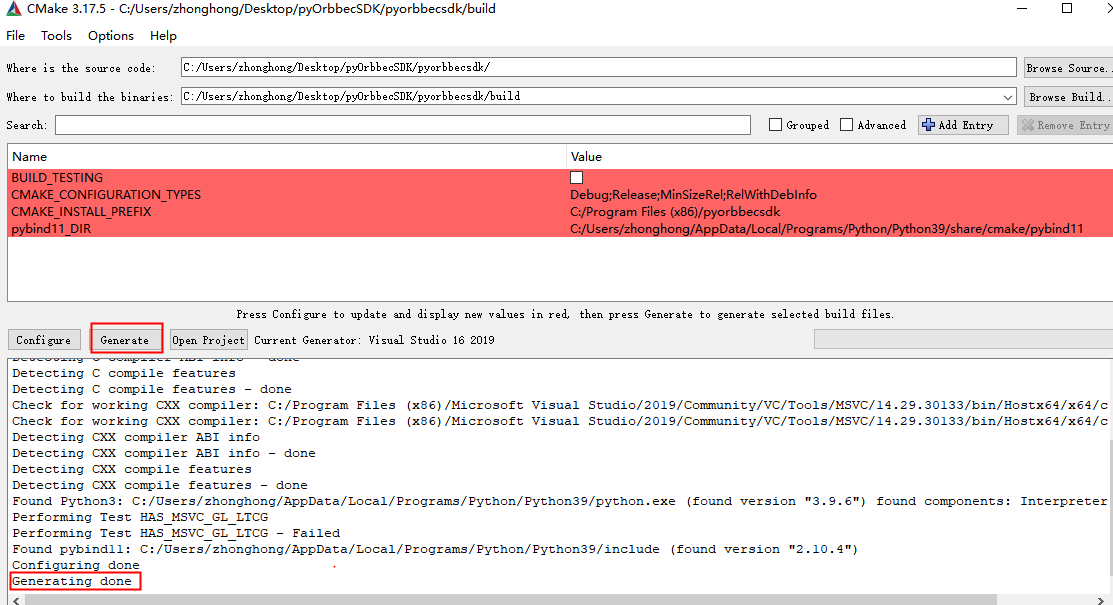
- Click “Generate”, as shown below:
Compile the Python SDK
- You can open the Python SDK project in two ways:
Method 1: Use Cmake, click the “Open Project” button, and open the Visual Studio project.

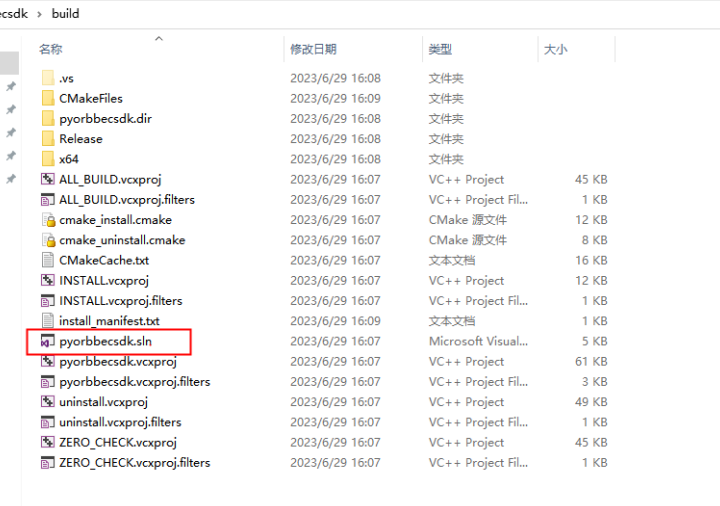
Method 2: Use the file explorer to directly start the Visual Studio project in the build directory, as shown in the following figure:
-
Open the Python SDK project, as shown below:
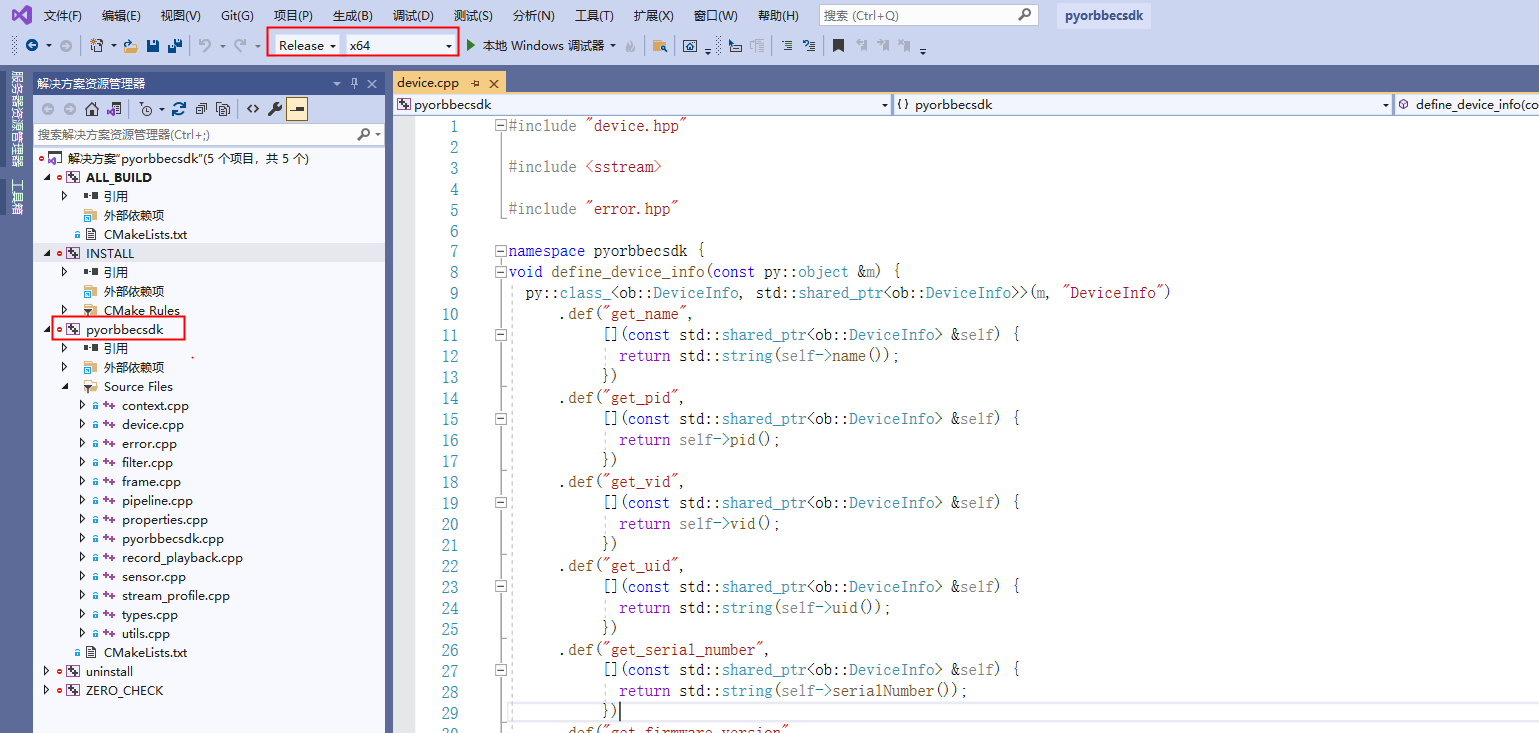
-
Right-click “pyorbbecsdk” to compile, as shown below:
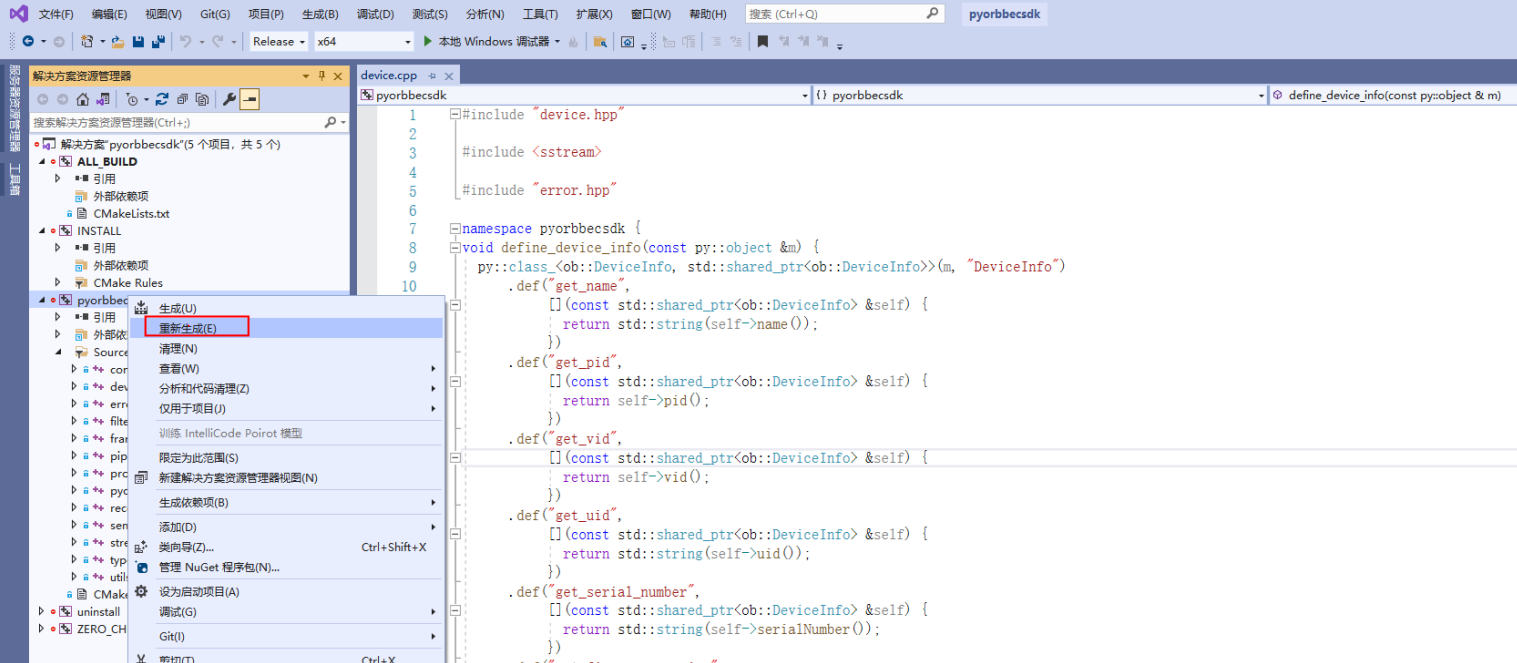
-
Right-click “INSTALL”, as shown below:
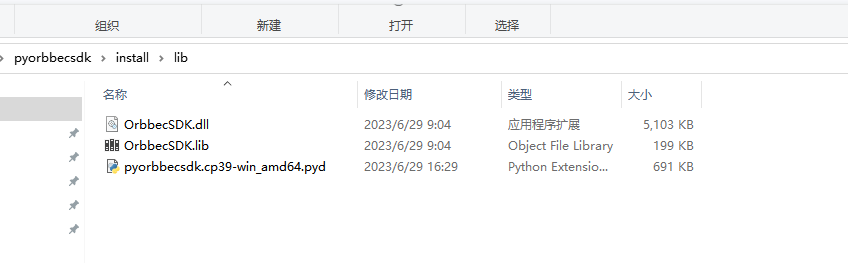
 The compiled files will be copied to the install/lib directory, as shown below:
-
Copy the files in the install/lib directory to the examples directory, as shown below:
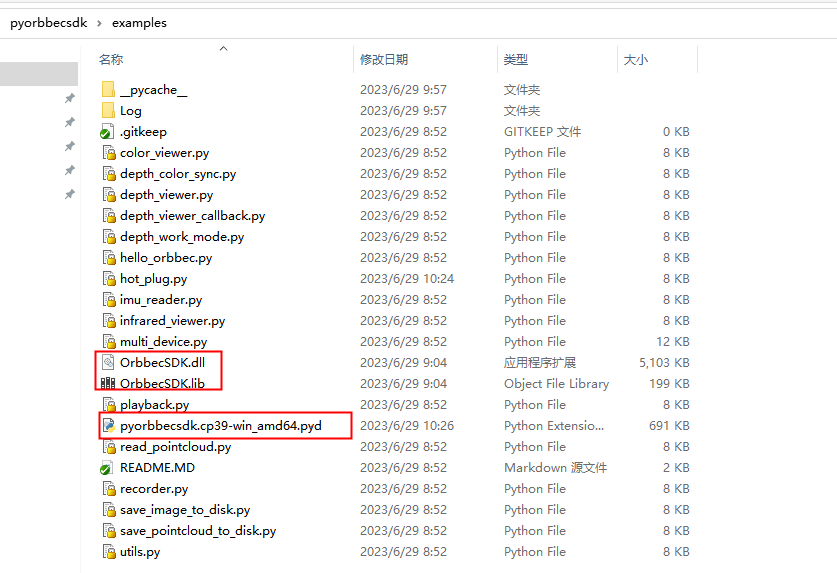
Test examples
In the examples directory, execute test examples such as python ColorViewer.py, as shown below:
Linux Python SDK Compilation
Download Python SDK source code
git clone https://github.com/orbbec/pyorbbecsdk.git
Install dependencies
sudo apt-get install python3-dev python3-venv python3-pip python3-opencv
Build
cd pyorbbecsdk
# Strongly recommended create virtual environment.
python3 -m venv  ./venv
source venv/bin/activate # activate virtual environment
pip3 install -r requirements.txt
mkdir build
cd build
cmake -Dpybind11_DIR=`pybind11-config --cmakedir` ..
make -j4
make install
Test examples
cd pyorbbecsdk
# set PYTHONPATH environment variable to include the lib directory in the install directory
export PYTHONPATH=$PYTHONPATH:$(pwd)/install/lib/
# install udev rules
sudo bash ./scripts/install_udev_rules.sh
sudo udevadm control --reload-rules && sudo udevadm trigger
# run examples
python3 examples/depth_viewer.py
Orbbec SDK Python Wrapper Function Introduction
Video stream acquisition
First we need to create a Pipeline, which makes it easy to open and close multiple types of streams and fetch a set of frames.
from pyorbbecsdk import *

config = Config()
pipeline = Pipeline()
Get all the stream configurations for the Depth camera, find the profile corresponding to the resolution, format and frame rate
profile_list = pipeline.get_stream_profile_list(OBSensorType.DEPTH_SENSOR)
depth_profile = profile_list.get_video_stream_profile(640, 0, OBFormat.Y16, 30)
Turn on video streaming by creating a Config, here the Depth stream will be enabled
config.enable_stream(depth_profile)
pipeline.start(config)
Wait for a frame of data in a blocking fashion, which is a composite frame containing the frame data of all the streams enabled in the configuration, and set the frame wait timeout to 100ms
frames = pipeline.wait_for_frames(100)
depth_frame = frames.get_depth_frame()
Stopping Pipeline will no longer produce frame data
pipeline.stop()
Introduction to common interface APIs
Getting a list of devices
from pyorbbecsdk import *

self.context = Context()
device_list = self.context.query_devices()
Getting a list of sensors
from pyorbbecsdk import *

# ...
device = device_list[0]
sensor_list = device.get_sensor_list()
Getting device information
from pyorbbecsdk import *

# ...
device_info = device.get_device_info()
device_name = device_info.get_name()
device_pid = device_info.get_pid()
serial_number = device_info.get_serial_number()
# ...
Set color auto-exposure
from pyorbbecsdk import *

# ...
auto_exposure = True
device.set_bool_property(OBPropertyID.OB_PROP_COLOR_AUTO_EXPOSURE_BOOL, auto_exposure)
Getting and setting colour camera exposure values
from pyorbbecsdk import *

# ...
device.set_bool_property(OBPropertyID.OB_PROP_COLOR_AUTO_EXPOSURE_BOOL, False)
curr_color_exposure = device.get_int_property(OBPropertyID.OB_PROP_COLOR_EXPOSURE_INT)
color_exposure = curr_color_exposure + 1
device.set_int_property(OBPropertyID.OB_PROP_COLOR_EXPOSURE_INT, color_exposure)
# ...
Getting and setting the colour camera gain
from pyorbbecsdk import *

# ...
device.set_bool_property(OBPropertyID.OB_PROP_COLOR_AUTO_EXPOSURE_BOOL, False)
curr_color_gain = device.get_int_property(OBPropertyID.OB_PROP_COLOR_GAIN_INT)
color_gain = curr_color_gain + 1
device.set_int_property(OBPropertyID.OB_PROP_COLOR_GAIN_INT, color_gain)
# ...
Mirroring the colour camera data stream
from pyorbbecsdk import *

# ...
mirror = True
device.set_bool_property(OBPropertyID.OB_PROP_COLOR_MIRROR_BOOL, mirror)
# ...
Switching laser
from pyorbbecsdk import *

# ...
laser = True
device.set_bool_property(OBPropertyID.OB_PROP_LASER_BOOL, laser)
# ...
Switching LDP
from pyorbbecsdk import *

# ...
ldp = True
device.set_bool_property(OBPropertyID.OB_PROP_LDP_BOOL, ldp)
# ...
Switch software filtering
from pyorbbecsdk import *

# ...
soft_filter = True
device.set_bool_property(OBPropertyID.OB_PROP_DEPTH_SOFT_FILTER_BOOL, soft_filter)
# ...
Reboot device
from pyorbbecsdk import *

# ...
device.reboot()
Other interfaces
Please refer to the examples in the examples directory of the source package and the test cases in the tests
directory
FAQ
Q: Why do I get the following error when running python3 examples/depth_viewer.py on Jetson Nano?
illegal instruction (core dumped)
A: Check your OpenCV installation. If you encounter the same error when running
import cv2
export OPENBLAS_CORETYPE=ARMV8 (or whatever the actual hardware is) before launching python should hopefully get around this. For example:
OPENBLAS_CORETYPE=ARMV8 python
If you would like to make this export permanent, you should open your .bashrc file by typing on the terminal:
nano ~/.bashrc
and add the following line at the end of the file:
export OPENBLAS_CORETYPE=ARMV8
Refer to this post
for more information on how to resolve the issue.
Q: Why do I get the following error when running python3 examples/depth_viewer.py?
 msg:failed to open usb device!  error: OB_USB_STATUS_ACCESS
  - type:St13runtime_error
[2023-07-04 17:09:19.891859][warning][117523][EnumeratorLibusb.cpp:342] failed to create usb device at index: 1, url:2-1.4.1-6
[2023-07-04 17:09:20.391989][error][117523][DeviceLibusb.cpp:109] failed to open usb device!  error: OB_USB_STATUS_ACCESS
[2023-07-04 17:09:20.392032][warning][117523][EnumeratorLibusb.cpp:342] Execute failure! A std::exception has occurred!
  - where:342#createUsbDevice
  - msg:failed to open usb device!  error: OB_USB_STATUS_ACCESS
  - type:St13runtime_error
[2023-07-04 17:09:20.392057][warning][117523][EnumeratorLibusb.cpp:342] failed to create usb device at index: 1, url:2-1.4.1-6
[2023-07-04 17:09:20.392072][warning][117523][ObException.hpp:40] usbEnumerator createUsbDevice failed!
Traceback (most recent call last):
  File "depth_viewer.py", line 73, in <module>
    main()
  File "depth_viewer.py", line 34, in main
    device: Device = device_list.get_device_by_index(0)
pyorbbecsdk.OBError: usbEnumerator createUsbDevice failed!
[2023-07-04 17:09:20.403747][info][117523][Context.cpp:81] Context destroyed
A: The current device does not have permission to access the device, check the PID of the current device
lsusb | grep 2bc5
Your output should look like this
Bus 002 Device 007: ID 2bc5:your_pid_here
Edit/etc/udev/rules.d/99-obsensor-libusb.rules,add the following line
SUBSYSTEM=="usb", ATTR{idProduct}=="your_pid_here", ATTR{idVendor}=="2bc5", MODE:="0666", OWNER:="root" GROUP:="video", SYMLINK+="you_device_name_here"
you_device_name_here is the name of the device you want to create, for example Astra.
Then restart the udev service
sudo udevadm control --reload-rules && sudo service udev restart && sudo udevadm trigger